Since summer is officially here (and we've had the summer weather to prove it), I figured it's about time I post this recipe: stevia sweetened lemonade. I love this stuff, and so does my family. We make a pitcher of this almost daily when it's hot out. It's nice to have an alternative to water, something with no sugar whatsoever, so you can drink with absolutely no guilt. Light, refreshing, and healthy!
The cool thing about this recipe is that is serves as a base recipe for all kinds of lemonades. If you want to add a little flair, try crushing a 1/2 cup of ripe strawberries in the bottom of the pitcher before adding the rest of the ingredients. Or add a handful of fresh mint. Or switch out the lemon juice for lime juice and add some cilantro. The options are endless!
Stevia Sweetened Lemonade
4 cups water + 2 cups ice
1/2 cup lemon juice
12-15 drops liquid stevia
In a large pitcher, add add ingredients and stir.
Enjoy!
Sunday, July 3, 2011
Sunday, June 19, 2011
Morel Mushroom Parmesan Pizza
This recipe I'm sharing with you today is quite possibly the best gluten free recipe on this blog to date. I mean, it's A-M-A-Z-I-N-G!!! My husband and I created this together, based off a suggestion from the morel mushroom guy at our local farmer's market a few weeks back. After talking with the guy, who not surprisingly was doting on the wonderful, one-of-a-kind flavor of the morel mushrooms he was selling, we decided to buy a few (and I mean a few, as in no more than 4 ounces, which still ended up costing us $11!). He promised we would not regret it (and for $11 mushrooms, he'd better not be lying). His serving suggestion was to toast some parmesan topped french bread in the oven for a few minutes and top them with sauteed morel mushrooms. It sounded simply enough, and yes, delicious. The only problem is that we don't eat french bread in our house, or any bread that contains gluten for that matter. So it got me thinking... what about a morel mushroom topped parmesan pizza? I knew I had a few Udi's pizza crusts in my freezer that I could pull out...
So that's exactly what we did that night for dinner. And spent the entire dinner oohing and ahhing over this darn good pizza. My husband (who does not abstain from gluten completely) said it was the absolute best pizza he's ever eaten, gluten free or otherwise. And I agreed. In fact, it was so good that we made the same pizza a few nights later, trying it with portabellas instead (since we were out of those $11 morels the same day we bought them). The result of the second time around? Almost as good, the morel version was just slightly better in our opinion, but both versions delish.
So my recommendation is that if morels are in season in your area, and you can afford it, go for the gusto. If not, try some portabellas. Either way, you'll be floating up to heaven on a dreamy pizza cloud for the few minutes it will take you to scarf down this delectable pizza.
And please, let me know your thoughts if you try this recipe. (And you should try this recipe!)
Morel Mushroom Parmesan Pizza (AKA the best pizza known to man)
1 Udi's gluten free pizza crust
2-3 tablespoons extra virgin olive oil
2 cloves garlic, crushed or grated
3/4 cup shaved parmesan cheese
2 tablespoons extra virgin olive oil
4 ounces (approx. 1 1/2 cups whole) morel mushrooms or 2 portabella mushrooms
Salt and pepper
Preheat oven to 375 degrees.
Place pizza crust on a baking sheet and drizzle olive oil over the top and add garlic. Spread both evenly over crust with the back of a spoon. Spread parmesan in a even layer over oil and garlic. Bake for 7-10 minutes until cheese is bubbly.
Meanwhile, heat remaining olive oil in a medium saucepan. Slice mushrooms and add to pan. Season with salt and pepper. Saute for 5-7 minutes, until mushrooms are soft.
When crust is done, pull out of oven and spread sauteed mushrooms over crust in an even layer. Slice and enjoy.
Serves 2.
So that's exactly what we did that night for dinner. And spent the entire dinner oohing and ahhing over this darn good pizza. My husband (who does not abstain from gluten completely) said it was the absolute best pizza he's ever eaten, gluten free or otherwise. And I agreed. In fact, it was so good that we made the same pizza a few nights later, trying it with portabellas instead (since we were out of those $11 morels the same day we bought them). The result of the second time around? Almost as good, the morel version was just slightly better in our opinion, but both versions delish.
So my recommendation is that if morels are in season in your area, and you can afford it, go for the gusto. If not, try some portabellas. Either way, you'll be floating up to heaven on a dreamy pizza cloud for the few minutes it will take you to scarf down this delectable pizza.
And please, let me know your thoughts if you try this recipe. (And you should try this recipe!)
Morel Mushroom Parmesan Pizza (AKA the best pizza known to man)
1 Udi's gluten free pizza crust
2-3 tablespoons extra virgin olive oil
2 cloves garlic, crushed or grated
3/4 cup shaved parmesan cheese
2 tablespoons extra virgin olive oil
4 ounces (approx. 1 1/2 cups whole) morel mushrooms or 2 portabella mushrooms
Salt and pepper
Preheat oven to 375 degrees.
Place pizza crust on a baking sheet and drizzle olive oil over the top and add garlic. Spread both evenly over crust with the back of a spoon. Spread parmesan in a even layer over oil and garlic. Bake for 7-10 minutes until cheese is bubbly.
Meanwhile, heat remaining olive oil in a medium saucepan. Slice mushrooms and add to pan. Season with salt and pepper. Saute for 5-7 minutes, until mushrooms are soft.
When crust is done, pull out of oven and spread sauteed mushrooms over crust in an even layer. Slice and enjoy.
Serves 2.
Wednesday, June 15, 2011
Herb & Olive Quinoa (gluten free, sugar free, dairy free)
Doesn't this dish just look happy? Like a quinoa confetti of sorts. It's such a great dish to serve in the summer because it tastes great at room temperature and does not need to be refrigerated. Not to mention (as I do in all of my posts about quinoa), it has amazing health benefits. The protein and amino acids alone! I love it because it is so full of protein and yet so light on the tummy. I always end up going back for seconds.
This dish is super versatile. Use any kind of olives and herbs you have on hand. For the herbs, I just plucked a variety from my new garden. I really like the purple basil in here because provides a beautiful contrast in color from the green of the other herbs. I purposely made this dairy free, but I think a handful of feta cheese would also be tasty.
Herb & Olive Quinoa
1 tablespoon extra virgin olive oil
1 small yellow onion
1 garlic clove
1 1/2 cups quinoa
2 1/4 cups water
pinch salt
1 cup mixed green and kalamata olives, chopped
1 cup loosely packed mixed herbs (I used green and purple basil, cilantro, and mint), chopped
1/2 toasted almond slivers or chopped almonds
Heat olive oil in a medium saucepan over med-low heat. Chop onion and garlic and add to pan. Cook for 3-5 minutes, until onions are translucent. Add quinoa and cook and additional minute. Add water, bring quinoa to a boil, then cover and reduce heat to low. Cook 15-20 minutes until water is absorbed.
Once quinoa has cooked, transfer to a serving bowl and add olives, herbs, and toasted almonds. Toss to coat.
Serve immediately or at room temperature.
This dish is super versatile. Use any kind of olives and herbs you have on hand. For the herbs, I just plucked a variety from my new garden. I really like the purple basil in here because provides a beautiful contrast in color from the green of the other herbs. I purposely made this dairy free, but I think a handful of feta cheese would also be tasty.
Herb & Olive Quinoa
1 tablespoon extra virgin olive oil
1 small yellow onion
1 garlic clove
1 1/2 cups quinoa
2 1/4 cups water
pinch salt
1 cup mixed green and kalamata olives, chopped
1 cup loosely packed mixed herbs (I used green and purple basil, cilantro, and mint), chopped
1/2 toasted almond slivers or chopped almonds
Heat olive oil in a medium saucepan over med-low heat. Chop onion and garlic and add to pan. Cook for 3-5 minutes, until onions are translucent. Add quinoa and cook and additional minute. Add water, bring quinoa to a boil, then cover and reduce heat to low. Cook 15-20 minutes until water is absorbed.
Once quinoa has cooked, transfer to a serving bowl and add olives, herbs, and toasted almonds. Toss to coat.
Serve immediately or at room temperature.
Wednesday, June 8, 2011
Pear Cranberry Coleslaw (gluten free, sugar free, vegan)
I love to serve this raw, colorful, super healthy salad with some grilled, grass fed burgers and homemade lemonade (sweetened only with stevia- that recipe to come...). It's the perfect addition to your backyard BBQ.
Pear Cranberry Coleslaw
Salad:
1 medium head green cabbage
2 medium carrots
1 pear
1/2 cup dried cranberries
Dressing:
3 tablespoons apple cider vinegar
1 tablespoon gluten free brown rice syrup, agave, or honey
10 drops liquid stevia
pinch of each: salt, ground ginger, and nutmeg
2/3 cup extra virgin olive oil
Shred cabbage and carrots in food processor fitted with shredding blade. Add to a large bowl. Dice pear and add bowl, along with cranberries.
In a separate, smaller bowl, add apple cider vinegar through spices and whisk to combine. Continue whisking and add olive oil in a slow stream.
Pour dressing over cabbage mixture and toss to combine.
Serves a lot. :)
Monday, June 6, 2011
Applesauce Rhubarb Muffins (gluten free, sugar free)
My mom just gave me some rhubarb from her garden and I've been anxious to make something with it. This morning I had the hankering for muffins and thought the rhubarb would be a great fit. The problem was, when searching online for a gluten free, sugar free rhubarb muffin recipe, I was hard pressed to find one. So I scoured my cookbooks, and low and behold, I found this recipe in my Better Homes and Gardens Baking Cookbook. Of course, I had to make some changes to make this fit my dietary needs (sans gluten and sugar), but I would venture to guess that these are every bit as good as the original gluten and sugar laden recipe. These will definitely make an annual appearance at my house whenever rhubarb season comes upon us.
The flour blend I used here is a new one to me. I've been searching for a pre-mixed flour blend that makes gluten free baking a snap. I decided to try Bob's Red Mill brand of all purpose gluten free flour blend to see what I thought. I chose this brand because I love the combo of flours he uses: garbanzo and fava beans, potato and tapioca starches, and sorghum, making this blend rather high on the protein and fiber scale (which I love), with 3 grams of each in a 1/4 cup serving. I'd read all sorts of reviews that people thought the "beany" flavor was too strong, but I chanced it anyway. And I have to say that I do not detect a hint of "bean-y-ness" in this flour blend at all. In fact, it has produced the most wonderful baked goods to date. The other morning I made Belgian waffles with this blend and my husband says the waffles were the best I've made to date (quite the high complement from him!). So I give this flour blend a five star rating; it's that good.
Applesauce Rhubarb Muffins
Dry ingredients:
1 1/2 cups all purpose gluten free flour blend (I use Bob's Red Mill)
1/4 cup + 2 tablespoons Xylosweet (xylitol)
1 teaspoon baking powder
1 teaspoon cinnamon
1/2 teaspoon xanthan gum
1/2 teaspoon powdered stevia
1/4 teaspoon baking soda
pinch salt
Wet ingredients:
1 egg
3/4 cup applesauce
1/4 cup coconut oil
3/4 cup chopped rhubarb
Topping:
1 teaspoon cinnamon
1 teaspoon Xylosweet (xylitol)
Preheat oven to 400 degrees. Line 9 muffin tins with paper or silicone liners.
In a medium bowl, mix together dry ingredients: flour blend through salt. In a separate bowl, whisk egg, applesauce, and coconut oil. Add wet ingredients to dry and stir to combine (batter may be a little lumpy). Fold in rhubarb.
Scoop batter into muffin tins, filling about 3/4 of the way up. Combine topping ingredients in a small bowl and sprinkle over the tops of muffins. Bake 18-20 minutes, until a toothpick inserted comes out clean. Let rest 5-10 minutes before enjoying.
Makes 9 muffins.
The flour blend I used here is a new one to me. I've been searching for a pre-mixed flour blend that makes gluten free baking a snap. I decided to try Bob's Red Mill brand of all purpose gluten free flour blend to see what I thought. I chose this brand because I love the combo of flours he uses: garbanzo and fava beans, potato and tapioca starches, and sorghum, making this blend rather high on the protein and fiber scale (which I love), with 3 grams of each in a 1/4 cup serving. I'd read all sorts of reviews that people thought the "beany" flavor was too strong, but I chanced it anyway. And I have to say that I do not detect a hint of "bean-y-ness" in this flour blend at all. In fact, it has produced the most wonderful baked goods to date. The other morning I made Belgian waffles with this blend and my husband says the waffles were the best I've made to date (quite the high complement from him!). So I give this flour blend a five star rating; it's that good.
Applesauce Rhubarb Muffins
Dry ingredients:
1 1/2 cups all purpose gluten free flour blend (I use Bob's Red Mill)
1/4 cup + 2 tablespoons Xylosweet (xylitol)
1 teaspoon baking powder
1 teaspoon cinnamon
1/2 teaspoon xanthan gum
1/2 teaspoon powdered stevia
1/4 teaspoon baking soda
pinch salt
Wet ingredients:
1 egg
3/4 cup applesauce
1/4 cup coconut oil
3/4 cup chopped rhubarb
Topping:
1 teaspoon cinnamon
1 teaspoon Xylosweet (xylitol)
Preheat oven to 400 degrees. Line 9 muffin tins with paper or silicone liners.
In a medium bowl, mix together dry ingredients: flour blend through salt. In a separate bowl, whisk egg, applesauce, and coconut oil. Add wet ingredients to dry and stir to combine (batter may be a little lumpy). Fold in rhubarb.
Scoop batter into muffin tins, filling about 3/4 of the way up. Combine topping ingredients in a small bowl and sprinkle over the tops of muffins. Bake 18-20 minutes, until a toothpick inserted comes out clean. Let rest 5-10 minutes before enjoying.
Makes 9 muffins.
Saturday, May 21, 2011
Rustic Buckwheat Cinnamon Raisin Scones (gluten free)
I just love scones. A good, hearty, not-too-sweet, a tad crumbly, baked piece of heaven. As I mentioned in an earlier post on my strawberry scones, I used to enjoy scones every morning with a cup of coffee on my way to early morning classes in college. This recipe is probably my favorite gluten free scone version I have ever had. When I say rustic, I mean rustic, just how a good scone should be. The buckwheat flour is really what gives it that over-the-top rustic feel, along with the warming cinnamon spice and chunky bits of raisins.
And this scone recipe is not-too-sweet, seeming almost more biscuit-like than dessert-like. With only a tablespoon of agave and the raisins alone to provide the sweetness factor, it's not overpowering with sugars. Since I gave up refined sugars a year or so ago, my taste buds have become particularly sensitive to sweetness in any food. Some desserts I simply cannot eat anymore, because they are just "too" sweet for me. It's actually amazing to me that once you give up refined sugars (and decrease sweeteners of any kind, even kinds that don't raise blood sugar levels, such as stevia, xylitol, agave, etc.), your body just doesn't crave them anymore. Don't believe me? Try fasting sugars and sweeteners for at least 21 days and just see what happens (after the initial detoxing period of a week or so is over!).
I can't take the credit for this recipe. It comes from Amy of Simply Sugar and Gluten Free's cookbook. It was the first of her recipes from this book that I tried, and have made a few versions of it, trying to get my perfect version. I use a different flour blend than Amy; one of my flours of choice here is buckwheat flour. And I offer substitutions to the butter and cream if you want to keep it dairy-free. I personally like using butter in this recipe as opposed to coconut oil because I feel the butter really enhances the richness factor (but either are good). I have also tried this recipe without the xanthan gum, just to see what happens. It's still good, but definitely a lot more crumbly. I opt to keep it in.
Probably my favorite thing about these scones is the smell. You'll swear you are baking cinnamon rolls when these bad boys are in the oven!
Rustic Buckwheat Cinnamon Raisin Scones
3/4 cup warm water
1/2 cup raisins
1/2 cup buckwheat flour
1/2 cup sorghum flour
1/2 cup blanched almond flour
1/2 cup arrowroot powder (could substitute tapioca starch)
2 teaspoons baking powder
1 teaspoon cinnamon
1/2 teaspoon xanthan gum
pinch salt
5 tablespoons chilled butter or solidified coconut oil
1 large egg
1/3 cup coconut milk beverage (such as So Delicious), almond milk, or cream
1 tablespoon agave
1 teaspoon vanilla extract
egg wash (1 egg, lightly beaten, with 1 teaspoon water added)
1 teaspoon cinnamon
1 teaspoon Xylosweet (xylitol)
Put a pizza stone in the oven and preheat to 375 degrees. (Alternatively, you can use a baking sheet, and no need to preheat it in the oven.) Lay a 10 inch wide section of parchment paper on the counter.
In a small bowl, add the warm water and raisins.
In a food processor, add buckwheat through salt. Pulse several times to combine. Add butter or coconut oil in chunks and pulse a few more times until resembles a crumbly mixture. In a separate bowl, beat the egg with the coconut milk, agave, and vanilla. Add egg mixture to food processor and pulse a few more times until a soft dough forms. Drain raisin soaking water, add raisins to processor, and pulse a remaining few more times until raisins are coarsely chopped and blended into dough.
Form the dough into a ball and place on the piece of parchment paper. Wet your hands and gently press the dough ball into an even 8 inch circle. Score the circle into six even slices with a sharp knife. With a paint brush or silicone brush, brush the egg wash over the entire circle, making sure to get all sides coated lightly. In another small bowl, combine the cinnamon and Xylosweet, then sprinkle over the scones with a spoon.
Remove the pizza stone from the oven and place the parchment paper with the scones on top of the stone (or put the parchment paper with the scones on the baking sheet). Bake for 15 minutes. Remove from oven and cut through each scored scone as to separate them completely. Place back in oven and bake for additional 3 minutes.
Let rest about five minutes before enjoying.
Makes 6 scones.
This post is a part of Simply Sugar and Gluten Free's Slightly Indulgent Tuesdays...
Wednesday, May 18, 2011
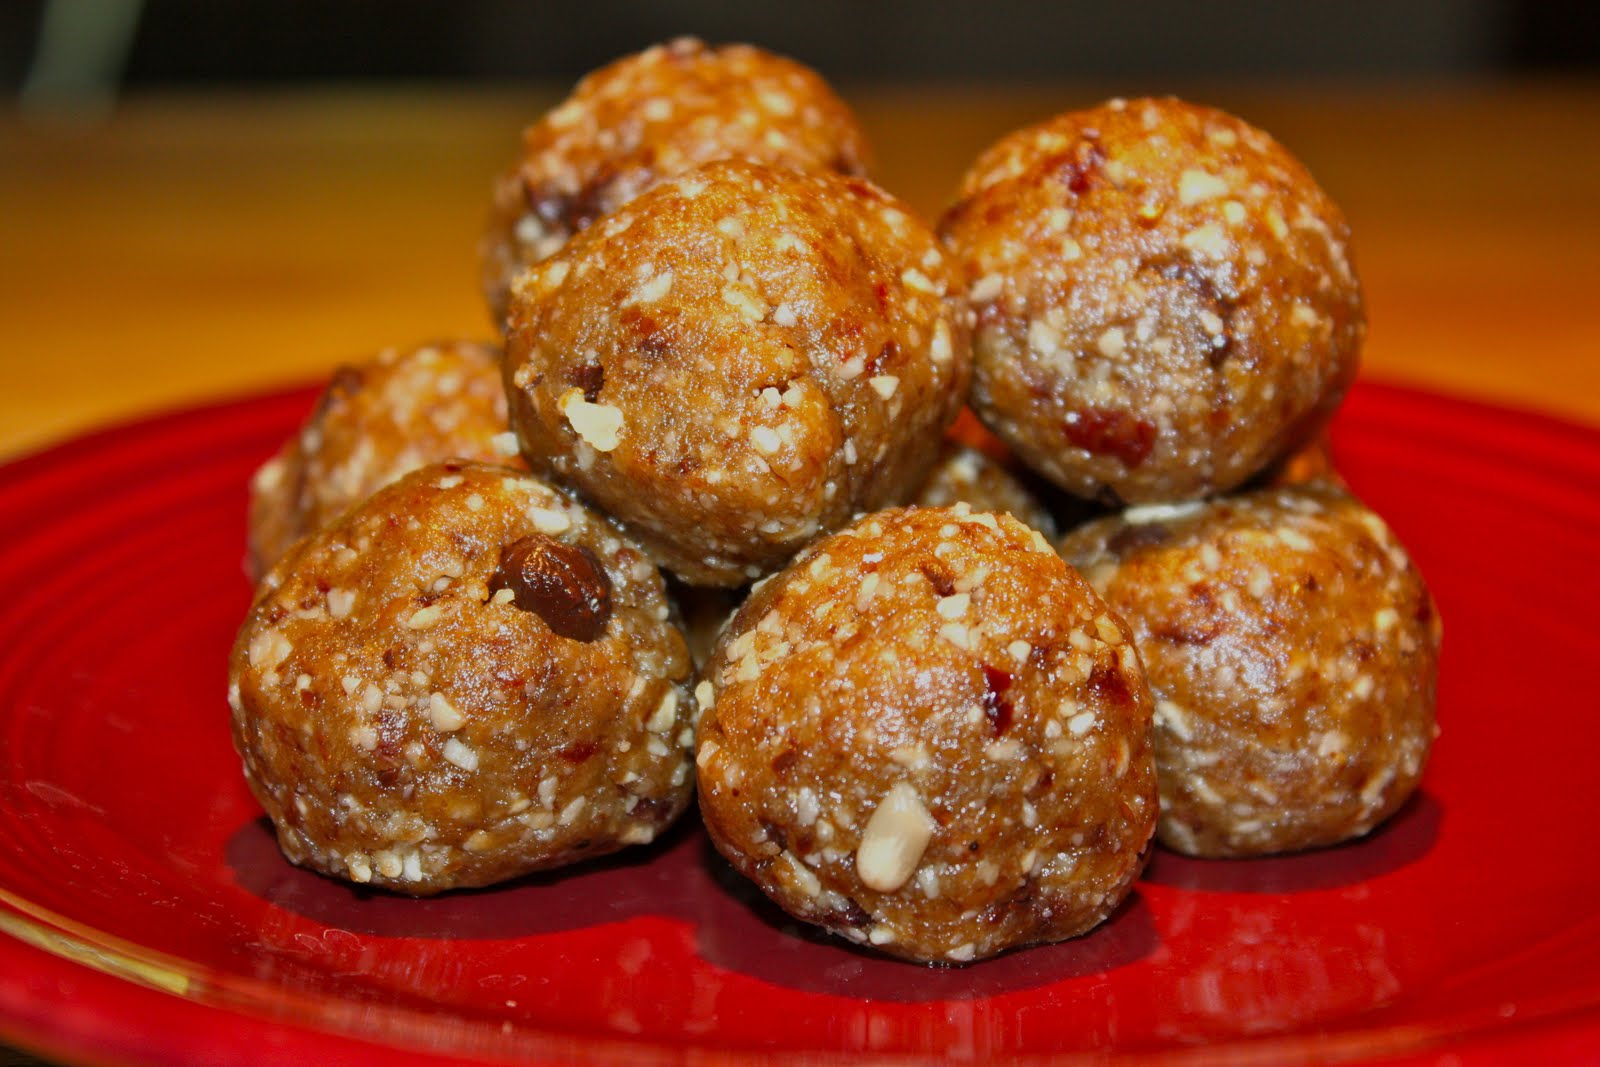
Chocolate Cherry Power Bites (gluten free, sugar free, dairy free, raw)
I have been in love with Larabars every since my raw food days. Simple ingredients, sweet- yes (thanks to the dates), but packed with protein and fiber. I keep a Larabar in my purse at all times in case of a hunger emergency. The only problem with Larabars is the cost. At most grocery stores, they retail for about $1.29 per bar, although I can frequently find them on sale for around $1.00 (at which times I purchase about 20 to stock up!). Nonetheless, I've been on a mission to create my own, homemade version of the Larabar. I knew it must be an easy recipe to re-create, with the list of ingredients so few and no baking required. Then all of a sudden, bloggers started posting recipes for their own versions, and came up with names ranging from energy bars, power bars, power balls, superfood bars, etc... Elana has posted quite a few in the last month or so (she's often a source of gluten free inspiration for me), an I've taken queues from this version in creating mine. And when she says they taste like cookie dough, she's right!
I've made so many batches of these, changing up the ingredients slightly each time, and this version is one of my favorites. I love the sunflower seeds in here. It almost gives these little guys a peanut-y taste (without the peanuts). I don't know how long they last in the fridge (I assume it would be a week or two) because we eat them all within two days... :)
So simple to make- it literally takes about five minutes- you have no excuse for not having an energy food on hand when you need it most (at about three o'clock for me!). Also makes a great pre-workout snack!
Chocolate Cherry Power Bites
1 cup Medjool dates (about 8), pitted
1 1/2 cups walnuts
1/2 cup sunflower seeds
pinch salt
1/2 tablespoon vanilla
2 tablespoons dark chocolate chips
2 tablespoons dried cherries
Place dates, walnuts, sunflower seeds, salt, and vanilla in a food processor and process for about a minute, until a course meal consistency is reached. Stop processor and add chocolate chips and cherries. Pulse for about 30 more seconds, until chocolate and cherries are coarsely chopped and integrated into the batter. Using a spoon, scoop about 1 tablespoon of mixture into your hands and form into balls. Repeat with remaining batter. Freeze for about 30 minutes, then store power bites in the fridge.
Makes about 18 power bites.
I've made so many batches of these, changing up the ingredients slightly each time, and this version is one of my favorites. I love the sunflower seeds in here. It almost gives these little guys a peanut-y taste (without the peanuts). I don't know how long they last in the fridge (I assume it would be a week or two) because we eat them all within two days... :)
So simple to make- it literally takes about five minutes- you have no excuse for not having an energy food on hand when you need it most (at about three o'clock for me!). Also makes a great pre-workout snack!
Chocolate Cherry Power Bites
1 cup Medjool dates (about 8), pitted
1 1/2 cups walnuts
1/2 cup sunflower seeds
pinch salt
1/2 tablespoon vanilla
2 tablespoons dark chocolate chips
2 tablespoons dried cherries
Place dates, walnuts, sunflower seeds, salt, and vanilla in a food processor and process for about a minute, until a course meal consistency is reached. Stop processor and add chocolate chips and cherries. Pulse for about 30 more seconds, until chocolate and cherries are coarsely chopped and integrated into the batter. Using a spoon, scoop about 1 tablespoon of mixture into your hands and form into balls. Repeat with remaining batter. Freeze for about 30 minutes, then store power bites in the fridge.
Makes about 18 power bites.
Subscribe to:
Posts (Atom)